Topic Tracker
Enable users to follow their favorite topics and authors and receive timely notifications when relevant content is published.
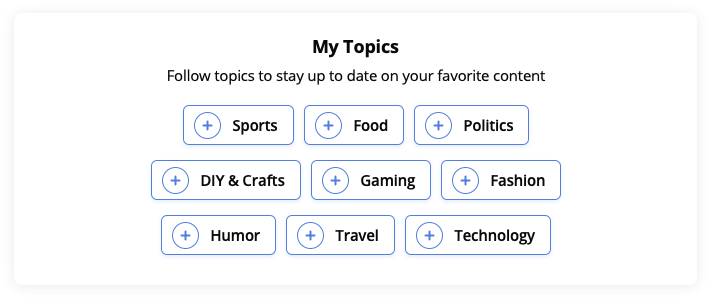
Topic Tracker allows users to follow their favorite topics and authors and to receive timely notifications when relevant content is published. When embedded on a page, this interactive widget drives user retention and increases the time your users spend on your site.

Topic Tracker's subscription widget
Requirements
Notification Bell
The notification bell provides users a way to receive on-site notifications about topics and authors they follow. This can be added to a page in one of the following ways:
- Implementing a prominent Notification Bell
- Using the bell menu embedded at the top of the Conversation widget
Page-level metadata
This metadata is used to populate the interactive widget and trigger notifications. A minimum of 2 tags is required for Topic Tracker to appear on a page.
The following table lists the page-level metadata sources that are compatible with Topic Tracker in priority order:
| Source | Values |
|---|---|
| LD-JSON Article Schema | Attributes:
|
| Open Graph | Properties:
|
| Standard Metadata | Name:
|
To override page-level topic and author metadata, add the
data-keywordsanddata-authorsattributes to the Topic Tracker embed code. These attributes apply only to the content displayed in Topic Tracker and will not be used to trigger notifications.
Monetization Campaign
Before you enable this feature, contact your OpenWeb PSM to set up a monetization campaign for your implementation and receive your site ID.
Implementation Options
OpenWeb provides you several approaches to add Topic Tracker to your site. Each is listed in the following table.
| Approach | Description |
|---|---|
| Standard | Displays Topic Tracker when a page loads where the launcher code is located. |
| Custom Location | Enables choosing the location of the Topic Tracker on a page. |
Standard
When using this implementation method, Topic Tracker appears where the launcher code is located. If Conversation is enabled, Topic Tracker appears horizontally above it.
To add Topic Tracker, use the following steps:
- In your OpenWeb Admin Panel, click Features > Topic Tracker.
- Under Enable/Disable Topic Tracker, click the toggle to Enabled. Additional Topic Tracker settings appear.
- From the Choose Topic Tracker Location dropdown menu, choose Above Conversation.
- Click Save & Publish.
Custom Location
When using this implementation method, you can choose the location in which Topic Tracker appears on a page.
To add Topic Tracker, use the following steps:
-
In your OpenWeb Admin Panel, click Features > Topic Tracker.
-
Under Enable/Disable Topic Tracker, click the toggle to Enabled.
-
From the Choose Topic Tracker Location dropdown menu, choose Manual Code Integration (horizontal orientation) or In a Sidebar (vertical orientation).
-
Under Code for Your Site, copy the embed code.
You can override the default page-level SEO metadata by adding the following attributes to the embed code:- Topic:
data-keywords="Topic1,Topic2,Topic3" - Author:
data-authors="Author1,Author2"
These attributes apply only to the content displayed in Topic Tracker and will not be used to trigger notifications for that article.
- Topic:
| Approach | Code |
|---|---|
| Manual Code Integration | <div data-spotim-module="topic-tracker" data-post-id="POST_ID" data-post-url="ARTICLE_URL"></div> |
| In a Sidebar* | <div data-spotim-module="topic-tracker" data-post-id="POST_ID" data-post-url="ARTICLE_URL" data-vertical-view="true"></div> |
- Click Save & Publish.
- On your page, add the Topic Tracker embed code in the desired page location.
- When embedding Topic Tracker on a page without other OpenWeb products, add the launcher code.
Updated 3 months ago
Add a notification bell to a prominent location so users can easily notice when a new relevant article was published
