
Conversation
Add a Conversation to your pages
Conversation enables you to create a fluent conversation experience that fuels quality interactions with community and content and allows users to create valuable and engaging content:
- Convert casual visitors into loyal, registered readers
- Significantly increase the user time-on-site
- Provide lightweight, fully customizable features
- Increase pageviews and SEO rankings
- Enable automatic content moderation
- Encourage user engagement with your content and other users

Conversation
Social Reviews
When implementing Conversation, you can also enable Social Reviews.
Social Reviews enables you to create a fluent conversation experience with a star rating aspect that fuels quality interactions with the community and content and allows users to provide their own feedback and ratings of the content.

Social Reviews
Prerequisite
| Item | Description |
|---|---|
| Launcher Code | JavaScript library that enables and supports configuring OpenWeb products and features on your pages |
Add a Conversation
OpenWeb provides you several approaches to add a Conversation to your site. Each is listed in the following table.
| Approach | Description |
|---|---|
| Standard | Enables adding a Conversation when a page loads |
| Action-initiated | Allows creating custom interactions |
| Virtual Pages | Enables choosing a location and adding to an infinite scrolling page or single-page application |
| React | Facilitates adding a Conversation to a React single-page application |
The Conversation has a 100% width. On a desktop, the left and right margins are 6px. On mobile web, left and right margins are 12px.
The minimum supported Conversation width is 320px.
Standard
When using this implementation method, Conversation appears where the positioning <div> element is located. This method enables you to quickly add a Conversation when a page loads:
- Embedding the Conversation with a single code snippet
- Managing settings in the Admin Panel
Follow these steps to add a Conversation:
- In the location where the Conversation should appear, add the Conversation positioning
<div>container.<div data-spotim-module="conversation"></div> - (Optional) Define the
data-social-reviewsto add a star rating to the Conversation. - (Optional) Customize the Conversation with additional attributes.
Action-initiated
This implementation method allows you to create custom interactions:
- Creating custom user experiences
- Integrating a Conversation with existing on-page functionality
Follow these steps to add a Conversation:
- After the user-initiated action, add the Conversation container in the location where the Conversation should appear.
<div data-spotim-module="conversation"></div>You can use__OPEN_WEB__.initOW()to initiate the Conversation following the user action. - (Optional) Add
data-social-reviews="true"to add a star rating to the Conversation. - (Optional) Customize the Conversation with additional attributes.
Example full code
<!-- Button code or user action -->
...

<!-- Conversation widget -->
<div data-spotim-module="conversation"></div>
Virtual Pages
This implementation method allows you to embed Conversation in an infinite scroll page or a single-page application.
Follow these steps to add a Conversation:
- In the location where the Conversation should appear, add the Conversation positioning
<div>element.<div data-spotim-module="conversation" data-post-url="ARTICLE_URL" data-article-tags="ARTICLE_TOPIC1, ARTICLE_TOPIC2" data-post-id="POST_ID"> </div> - Define the
data-post-idto set the unique article identifier that is specific to the article page. - Define the
data-post-urlto set the full URL address of the page in which the launcher code is embedded. - (Recommended) Define the
data-article-tagsto inform OpenWeb of the main topics in the article. - (Optional) Add
data-social-reviews="true"to add a star rating to the Conversation. - (Optional) Customize the Conversation with additional attributes.
If you need to wrap a Conversation within a feed or a continuous element, use the
[data-spotim-default-areas]selector in order to wrap the Conversation.
Example full code
<!-- OpenWeb launcher code -->
<script
    async
    src="https://launcher.spot.im/spot/SPOT_ID"
    data-spotim-module="spotim-launcher">
</script>

...

<!-- Conversation -->
<div data-spotim-module="conversation"
     data-post-id="POST_ID"
     data-post-url="ARTICLE_URL"
     data-article-tags="ARTICLE_TOPIC1, ARTICLE_TOPIC2">
</div>
React
This implementation method allows you to add a Conversation to a React single-page application. The OpenWeb React SDK npm repository explains how to use the npm package:
- Installing the npm package
- Adding a Conversation to a single-page application
Conversation <div> Attributes
The following attributes apply only to Conversation implementations.
| Attribute | Description |
|---|---|
| data-article-tags string | Informs OpenWeb of the main topics of the article Multiple topics can be added by delimiting with a comma. The values of this attribute should usually align with the KEYWORDS metadata schema. |
| data-author-id string | Controls the display of an Author Badge next to the author's name |
| data-messages-count number | Controls the initial number of displayed messages in Conversation |
| data-post-staleness-days number | Controls the number of days after which the post becomes read-only |
| data-post-url string | Full URL address of the page in which the launcher code is embedded. The post URL helps OpenWeb know the source URL of a post ID. This is especially useful when post IDs are reused across multiple pages, single page applications, and infinite scroll implementations. Each post ID should have only one post URL. NOTE: This attribute must match the actual URL of the original page where the launcher code is embedded, even if that page has a different canonical URL. For example, a news aggregator that uses canonical URLs to mark the original source of an article, must still use the reprint's actual URL for this attribute. |
| data-read-only boolean | Controls if additional comments could be added to an article. This attribute must be set to true to disallow any additional comments or replies from being posted. |
| data-seo-enabled boolean | Controls if OpenWeb makes an API call to the SEO API when a page is rendering and embeds the SEO markup into the HTML of your page OpenWeb recommends a backend integration for improved indexing results. |
| data-social-reviews string | Controls displaying a star rating that allows users to provide feedback on and to rate the content 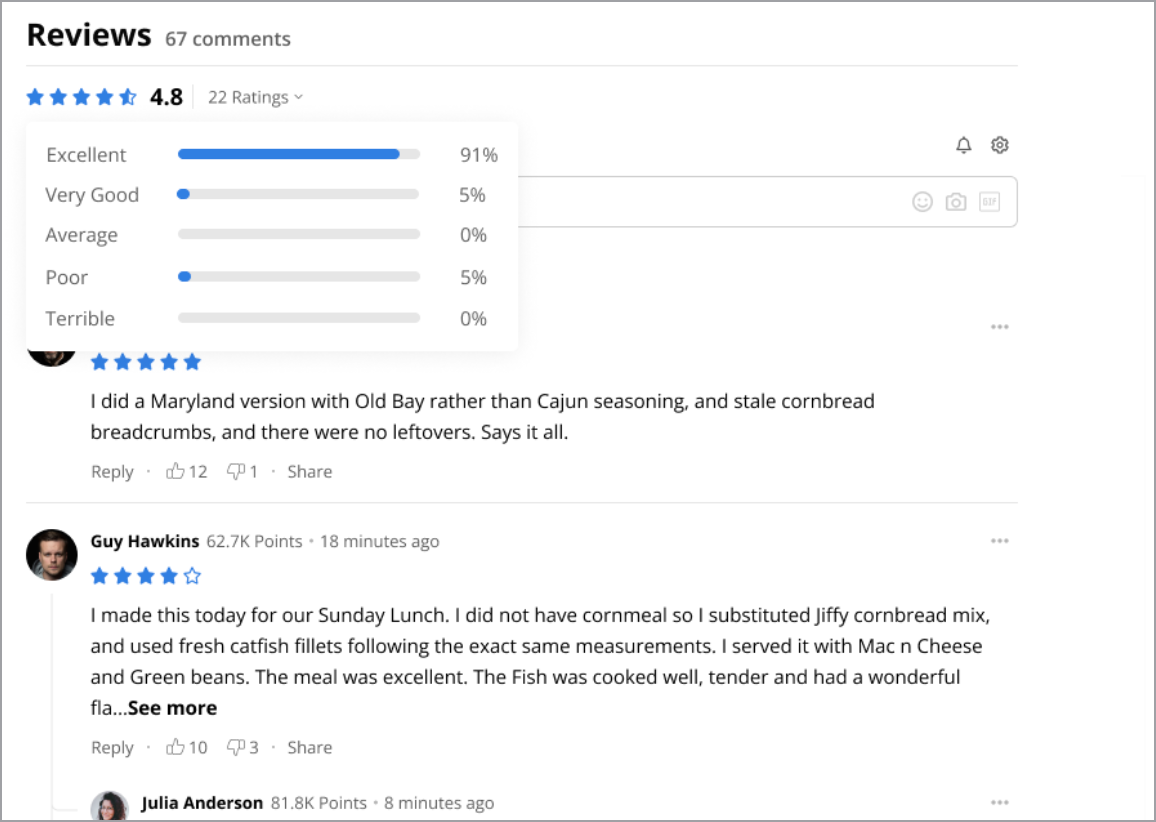 Possible values:
|
| data-sort-by string | Controls the sorting for an article, overriding the default sort setting of the site Possible values:
|
Updated 7 months ago
Next Step
Now that you have added a Conversation to your page, you can continue to configure your users’ experiences: