Wordpress
Learn how to add OpenWeb products to your WordPress posts.
In addition to standard websites, native mobile apps, and accelerated mobile pages, OpenWeb products can be implemented on WordPress posts. The following table summarizes the different options.
| Approach | Description |
|---|---|
| Standard | Enables adding OpenWeb products when a post loads |
| Custom Location | Enables choosing the location of OpenWeb products on a post |
Standard Implementation

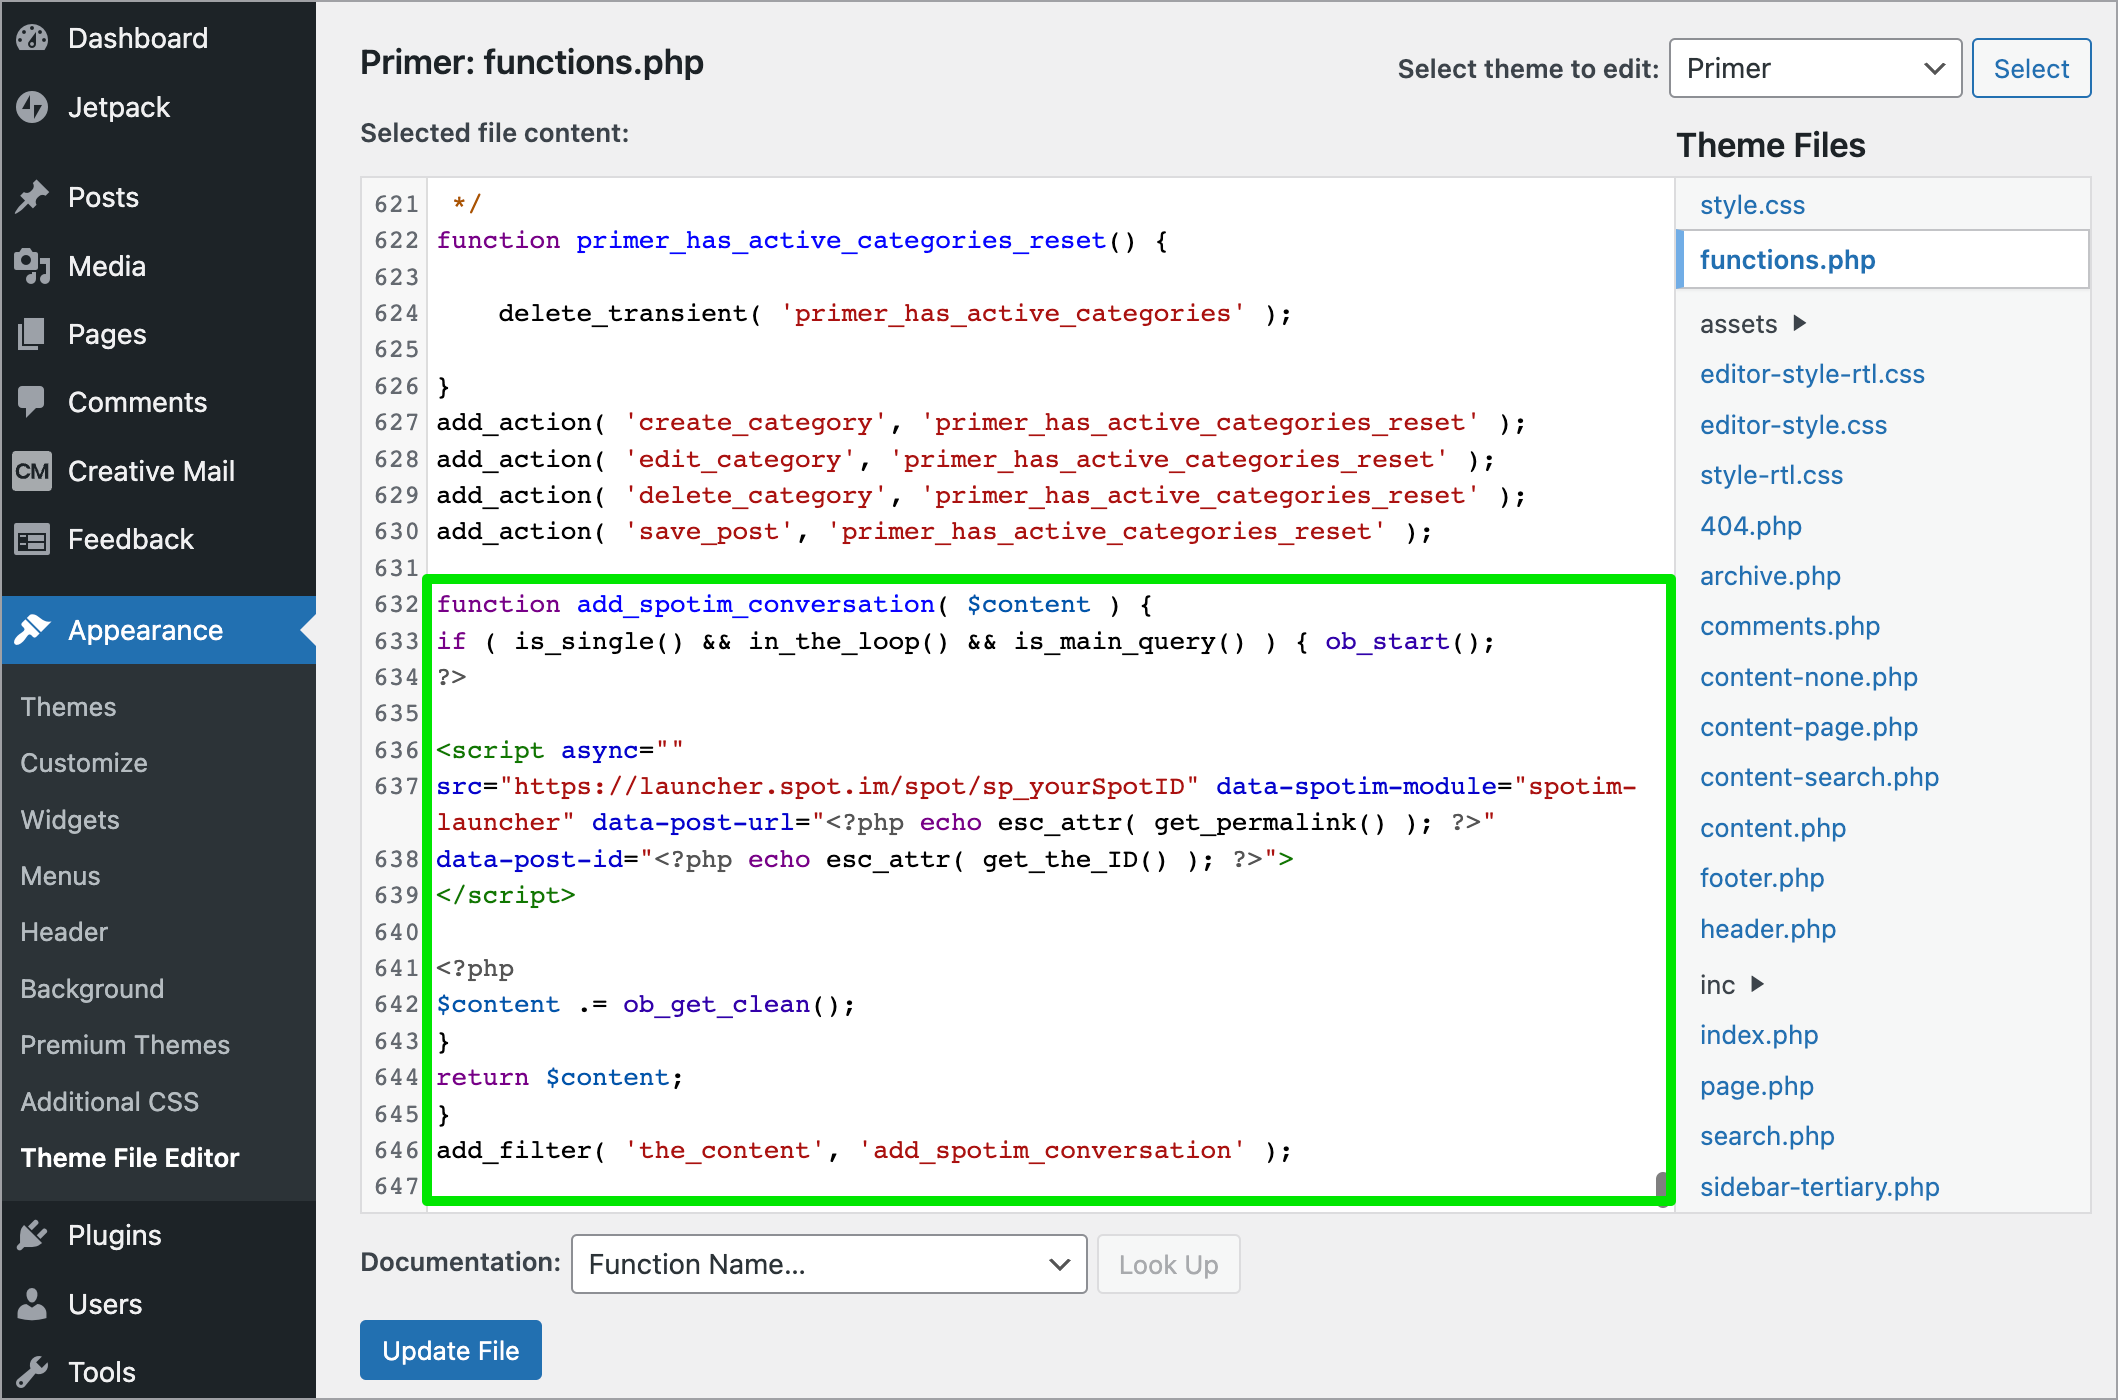
Standard launcher for WordPress
Use the following steps to add the OpenWeb products to all WordPress posts:
-
In WordPress from the side navigation, click Appearance > Theme File Editor. The Edit Themes page appears.
If a warning popup window appears, read the message and click I understand.
-
From the Theme Files list, click functions.php. This may also be named Theme Functions(functions.php). The contents of the file appear.
-
Add the launcher code to your page.
function add_spotim_conversation( $content ) { if ( is_single() && in_the_loop() && is_main_query() ) { ob_start(); ?> <script async="" src="https://launcher.spot.im/spot/SPOT_ID" data-spotim-module="spotim-launcher" data-post-url="<?php echo esc_attr( get_permalink() ); ?>" data-post-id="<?php echo esc_attr( get_the_ID() ); ?>"> </script> <?php $content .= ob_get_clean(); } return $content; } add_filter( 'the_content', 'add_spotim_conversation' ); -
Replace the
SPOT_IDplaceholder with your Spot ID.
Your Spot ID is your unique OpenWeb identifier. When you log into your OpenWeb Admin Portal, you can copy your Spot ID from the URL: admin.spot.im/spot/SPOT_ID/...
- Click Update File.
Custom Location Implementation
Add the OpenWeb launcher

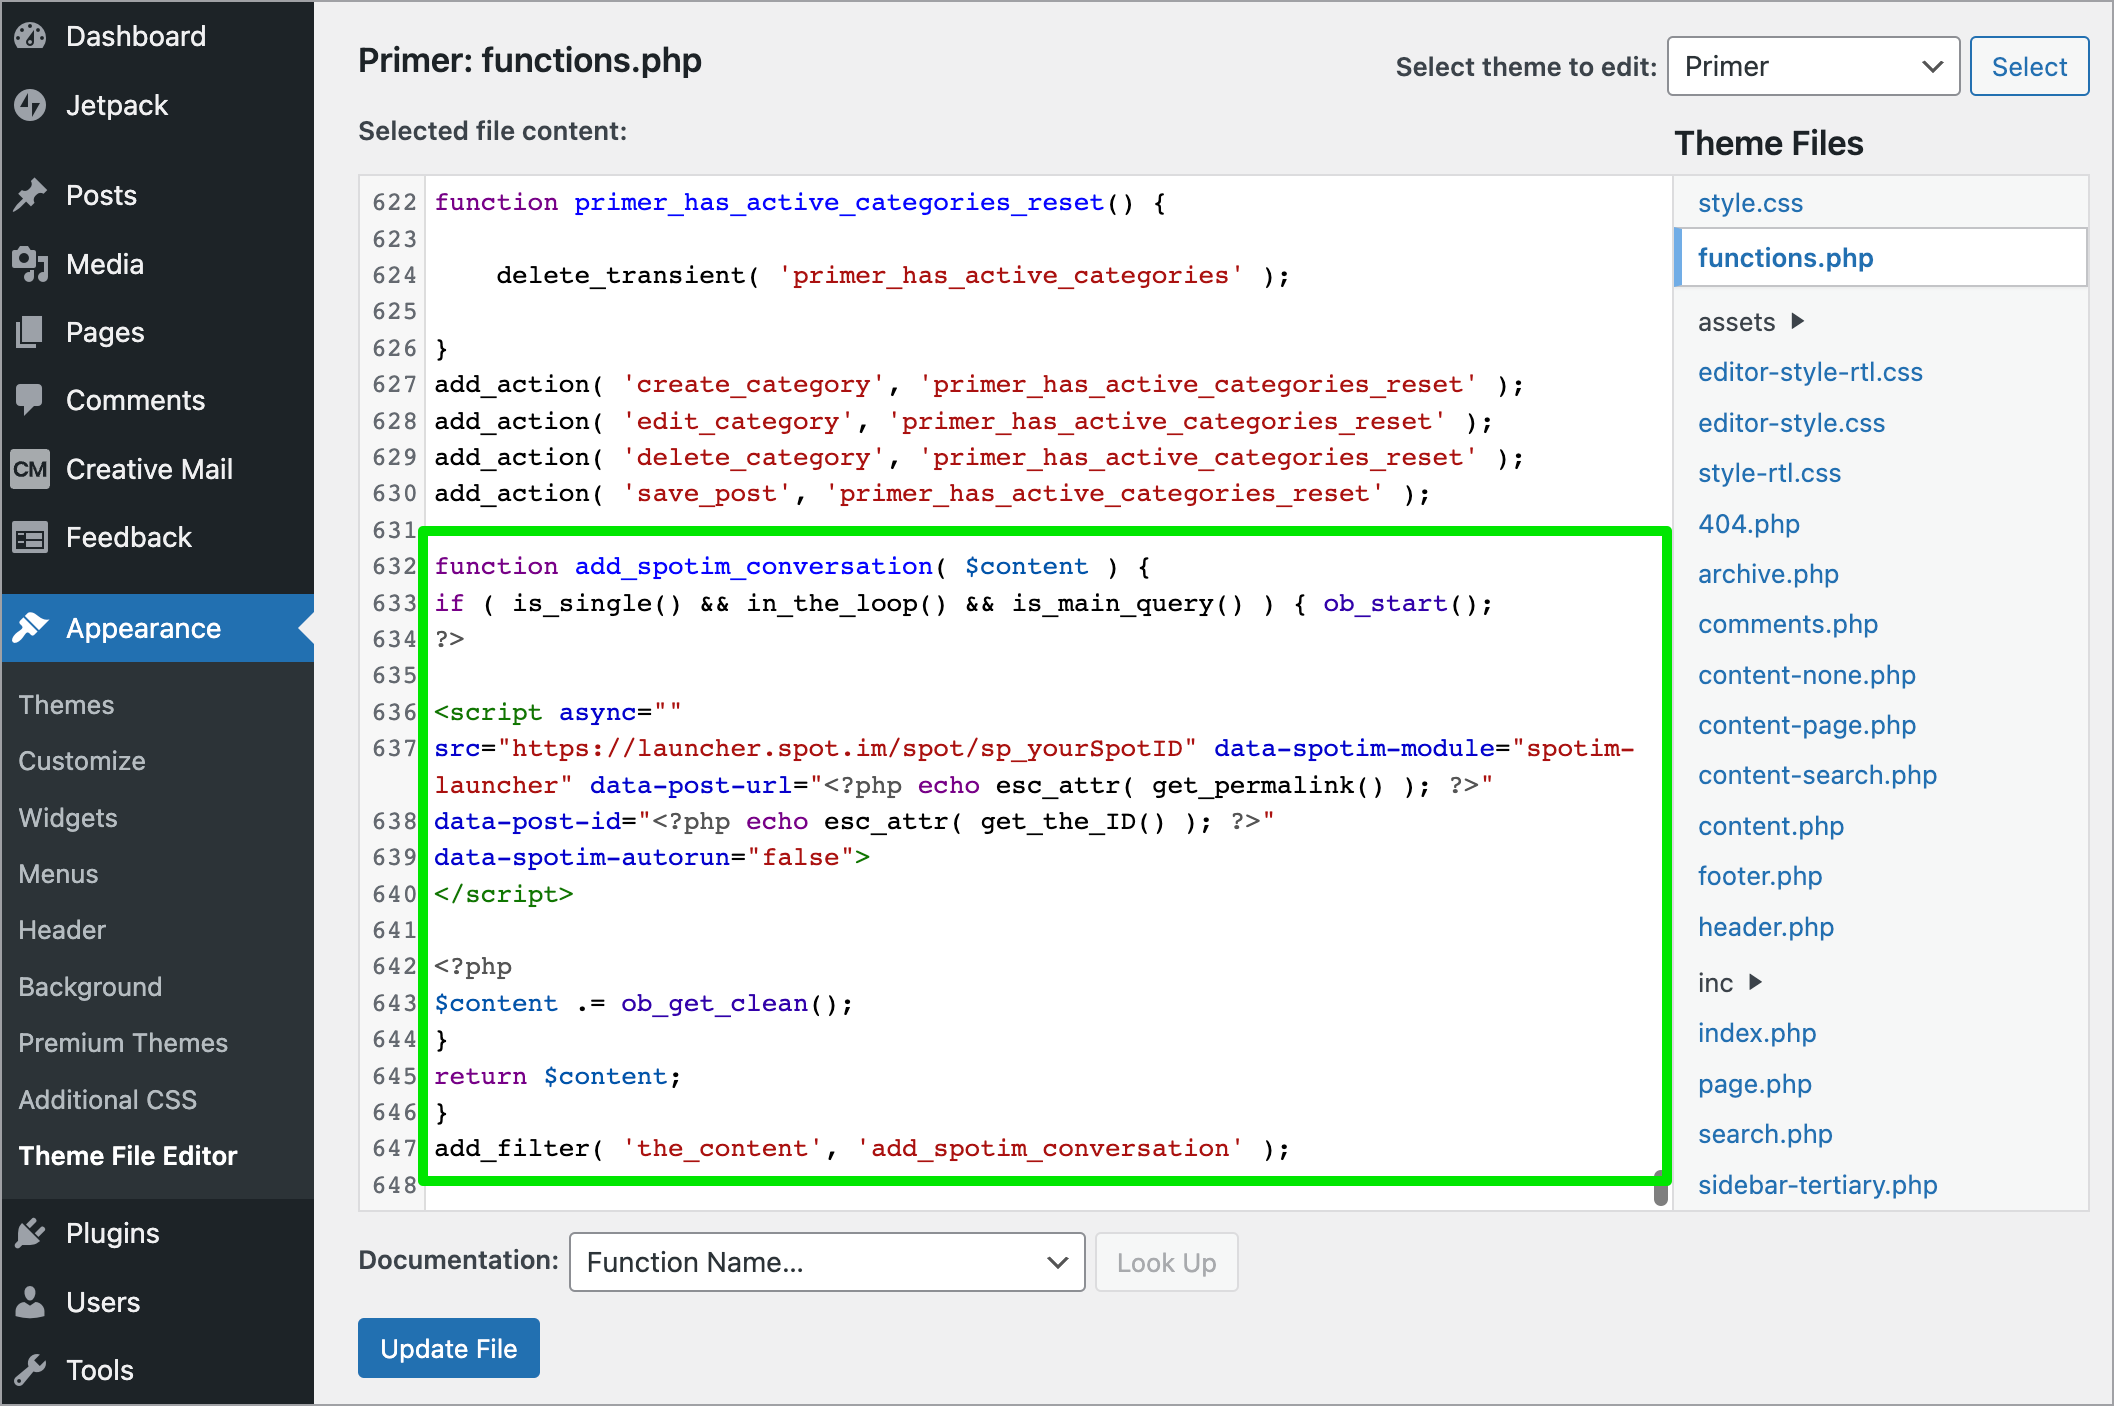
Custom location launcher for WordPress
Use the following steps to add the OpenWeb launcher to a WordPress site:
-
In WordPress from the side navigation, click Appearance > Theme File Editor. The Edit Themes page appears.
If a warning popup window appears, read the message and click I understand.
-
From the Theme Files list, click functions.php. This may also be named Theme Functions(functions.php). The contents of the file appear.
-
Add the launcher code to your page.
function add_spotim_conversation( $content ) {
if ( is_single() && in_the_loop() && is_main_query() ) { ob_start();
?>

<script async=""
src="https://launcher.spot.im/spot/SPOT_ID" data-spotim-module="spotim-launcher" data-post-url="<?php echo esc_attr( get_permalink() ); ?>"
data-post-id="<?php echo esc_attr( get_the_ID() ); ?>"
data-spotim-autorun="false">
</script>

<?php
$content .= ob_get_clean();
}
return $content;
}
add_filter( 'the_content', 'add_spotim_conversation' );
- Replace the
SPOT_IDplaceholder with your Spot ID.
Your Spot ID is your unique OpenWeb identifier. When you log into your OpenWeb Admin Portal, you can copy your Spot ID from the URL: admin.spot.im/spot/SPOT_ID/...
- Click Update File.
Add OpenWeb products

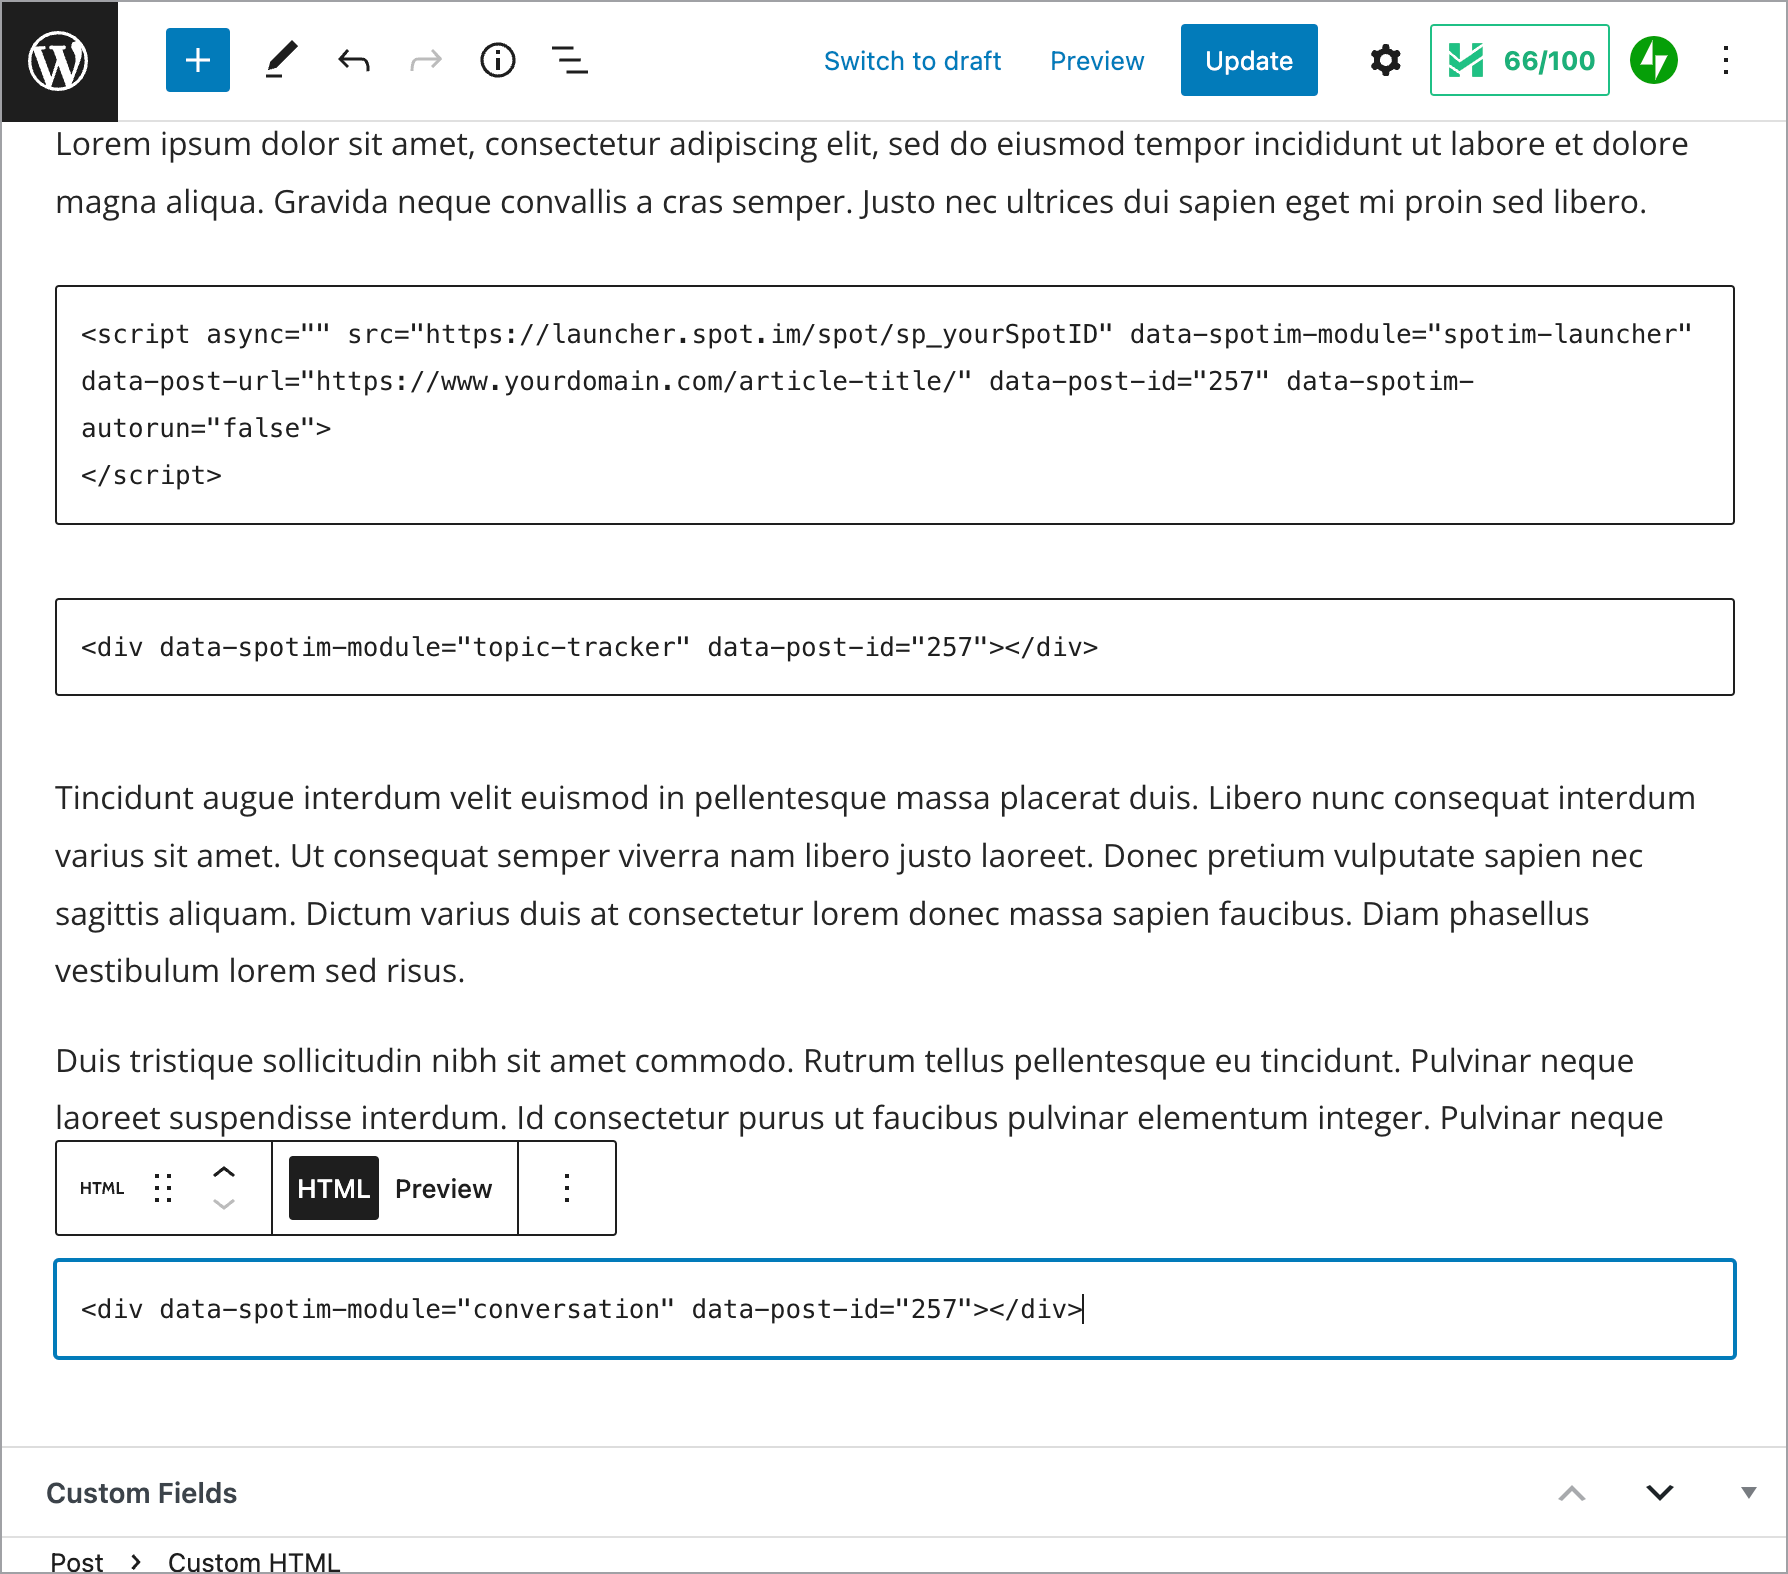
OpenWeb product embed codes on a WordPress post
Use the following steps to add the OpenWeb products to a WordPress post:
-
Open an existing post or create a new post.
-
In a Custom HTML block, add the launcher code
<script>.<script async src="https://launcher.spot.im/spot/SPOT_ID" data-spotim-module="spotim-launcher" data-post-url="ARTICLE_URL" data-post-id="POST_ID" data-spotim-autorun="false"> </script> -
Replace all the placeholders in the launcher code:
SPOT_ID,ARTICLE_URL, andPOST_ID.
The post ID is located in the WordPress URL: yourdomain/wp-admin/post.php?post=12&action=edit -
In the location where the OpenWeb product should appear, add the embed code in a Custom HTML block. Embed codes for each OpenWeb are listed on the following tabs.\
<div data-spotim-module="conversation" data-post-url="ARTICLE_URL" data-article-tags="ARTICLE_TOPIC1, ARTICLE_TOPIC2" data-post-id="POST_ID"></div><div data-conversation-spotlight></div><div data-spotim-module="pitc"></div><div data-spotim-app="reactions" data-post-id="POST_ID"></div><div data-spotim-module="topic-tracker" data-post-id="POST_ID"></div>
Some products requires additional requirements and setup:
Updated 3 months ago
